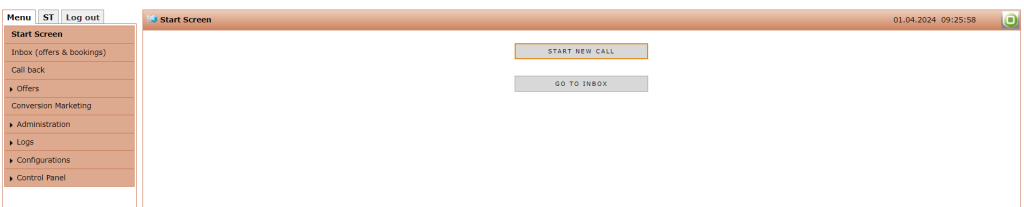
While opening phoneNG, you will see the following starting page:
On the left hand side, you can see the menu tab with some sub menus:
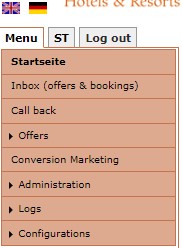
By Default, the user will start always with the „menu“ tab. Above the tabs, you may choose the language you would ike to use phoneNG in. Here, you only manage the user’s language not the language for the guest correspondence.
1. Start Screen
As you can see already, the start page consists of the main menu on the left and the two buttons in the middle. With the first button, you may „Start a new call“ and with the second button you will „Go to inbox“. If a guest calls you to reserve a room, you click on „Start a new call“. The other one leads you to the inbox, where you can find all existing reservations separated by hotel or combined for all hotels.
2. Inbox (Offers and Bookings)
Here you can find all offers and reservations which arrived inside rezNG. You will find bookings made inside phoneNG because the guest called, online reservations and also bookings which are mad through OTA. Also offers which are made here, can be visible in the inbox:

There are different ways to search for bookings and offers. For hotel chains, you should first of all select the hotel for which the booking was made out of the drop down menu „Select hotel“. By selecting the hotel, the result list will get more clear. Also, if you have the offer or reservation ID, you may also enter this one in the field „offer number“ or „confirmation number“.
Best Practice: Sometimes, you are searching for reservations made a longer time before. You should delete the „creation date from“ and „creation date to“ fields because this may limit the data base which is proofed.
Start the search by clicking on „Search“. By pressing the button „Reset“ all insert information were deleted and you start with an empty surface.
When the required reservation or offer is found, you can see it underneath in the result list:
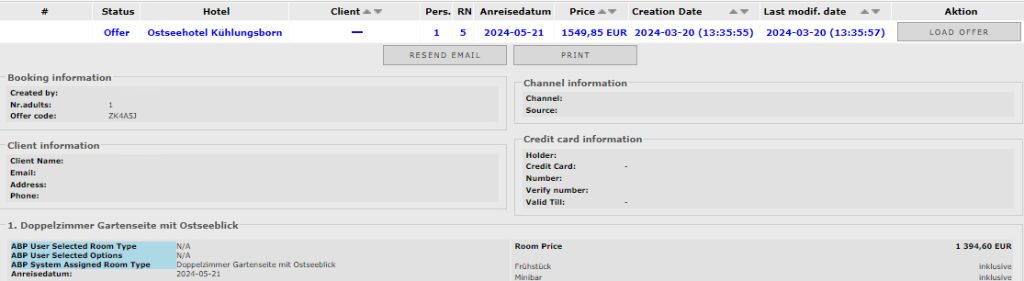
Here you can see the guest data, the booked room type and rate plan. If it is an offer, you may see a button „Load offer“ at the end of the line. By clicking on it, you will be lead directly into the availability and prices step of phoneNG. Now, you can do some modifications if necessary and re-send the new offer.
3. Call Back
Some hotels use the call back function on their Online Booking Engine. If a guest registers for this call, the hotel gets an e-mail with the guest’s name and contact details. You can also see inside phoneNG which call back requests a hotel has. By clicking on the „Call back“ menu, you will see the following surface:

For hotel chains, you will have the possibility to select a hotel for which all requests should be shown. By activating the checkbox underneath the hotel selection, you can also see resolved requests. Hotels use this overview to check if all call back requests were answered.
The result list is divided into 6 columns:
- Client – Guest name
- Date and Time – At which time the guest wants to be called
- Contact Info – Phone number and email address to reach the guest
- Comments – Comments entered by the guest
- Status – If the guest was already called and by which employee
- Reservations – Confirmation number or a button that displays all reservation details
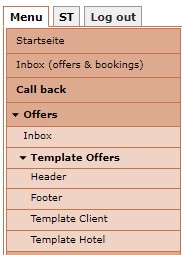
4. Offers
This menu point is divided again into the following sub menus:
Inbox
This sub menu leads you to the inbox which can also be opened from the start screen. How to search for offers is already described in the chapter „Start Screen“.
Template Offers
Here, every hotel creates its individual offer template which is sent to the guest. The sub menu is again divided into four parts. You have the option to create a header, a footer and different templates for guest and hotels.
Header
The header can be created individually with a hotel logo or colours which represent the hotel. You may use the HTML format to implement it or you set it up by using the tools you can see above the text window. The handling is similar to Word.
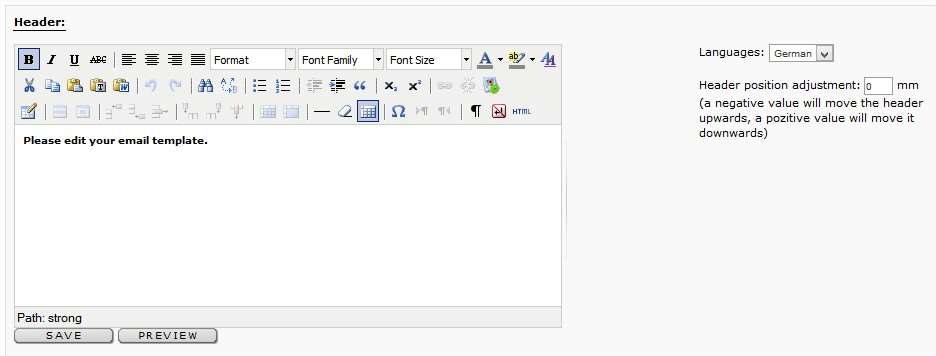
If more than 1 hotel is registered inside phoneNG, the user has to selct the hotel for which the header would be created. Further on, he has to choose the language for the header on the right hand side of text field. Underneath the language selection, you can fix the position of the header. A negative value will move the header upward, a positive value will move it downward.
If the hotel logo is already set up inside rezNG, you can link to it and use it for the header as well. After entering all necessary information you would like to have in the header, you must click „Save“ to keep the created header. The button „Preview“ shows how the header will look like on a confirmation letter:

Footer
The creation of the footer is the same as the one of the header. Also here, you need to press „Save“ to store all implemented information for further offer letters. To see how the footer looks on the letter, press „Preview“ and get the following result:

Template Client
You can create different letters for the guest and the hotel. This might be helpful because the guest needs more information than the hotel does. When clicking on „Template client“, the following is presented:
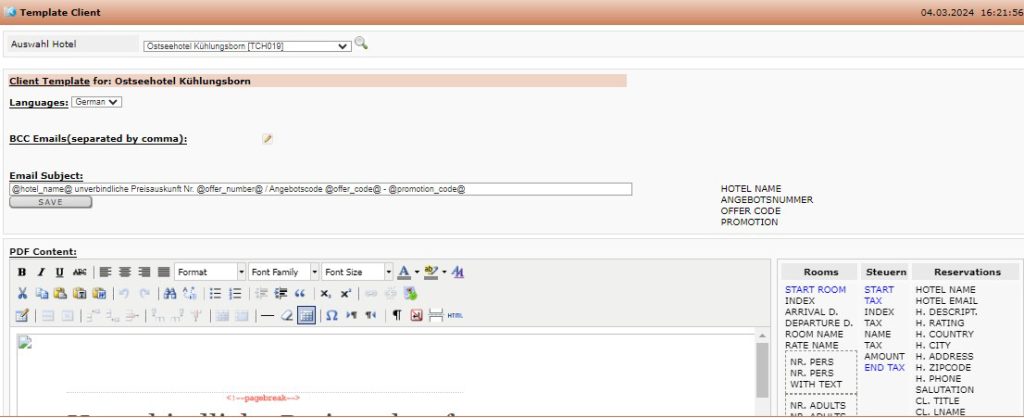
The work space is splitted in two sections. In the first one, you set up the language the template is created in. You can also add more e-mail adresses, the offer should be sent. This functionality is useful if the offer should be available for the hotel and at larger gotel chains as well for the central reservation department. The e-mail subject must be configurated as well and should include all important information for the guest to recognize that this mail is the hotel offer. You can use the elements next to the field for the e-mail subject. To save all entered elements, press „Save“ directly below the e-mail subject.
The pdf content will be insert in the text field below. The user can enter the text like he does in a Word document so no further explanation will be given here. Also the text elements reight next to the text screen can be used to create the offer letter. If you decide to use text elements, the system will automatically fill in the information you entered in the system. Press the button „Save“ directly below the text screen to store all insert text.
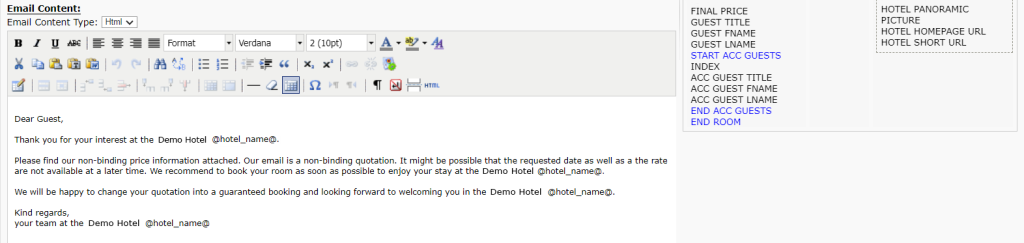
The last part which you need to enter is the e-mail content. It is the text the guest will read first when he gets the offer by mail. The method of entering the text is the same as described above for the pdf content. The text elements on the right hand side can be used for the e-mail content as well.
At the end of the page, you press the button „Save“ below the text screen to make sure that the insert text will be kept.
The mentioned steps should be done for all languages the Booking Engine is offered in.
Hotel Template
The procedure for creating the hotel template is the same like the one for the client‘s template. A difference is that at the beginning no additional e-mail address must be insert because this is managed inside the client’s template menu.
All texts have to be stored by clicking „Save“ after you have entered them in the text screens.
Conversion Marketing
This menu offers a reporting possibility. You may get an impression of how every single user works in the system. How many offers he or she creates and how many reservations were made. The working space is split into two sections:
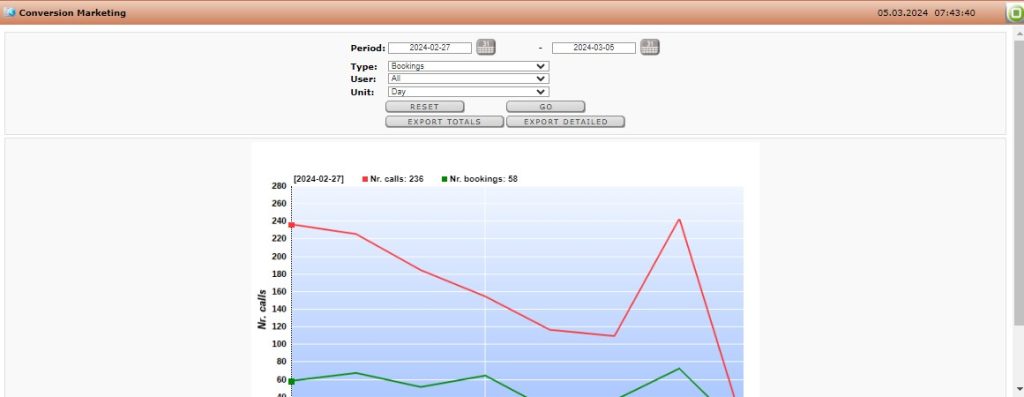
The upper section contains the filters which can be given to create the report:
- Period – Time period which will be evaluated;
- Type – Evaluation of bookings, offers, bookings and offers, direct bookings without offer, indirect bookings with offer);
- User – User name;
- Unit – In which unit the results should be presented (day, week, month).
To start the evaluation, click „Go“ after you have entered all necessary parameters. If you press „Reset“ all entered filters were deleted and you can start with a new request.
All results were presented as a graph below the parameter section. If you move the mouse over the graph the dates and figures of offers and booking will change.
The user may also get the results as an Excel sheet. You can select if you would get a report which shows all users and her activities or if you prefer to get a detailed evaluation. To get one of this Excel sheets, you press the button „Export Totals“ or „Export Detailed“ which are located directly above the graph.
Administration
This menu consists of three sub menus:

Accounts List
It is a list of all users which are registered for phoneNG or rezNG. Also the status of the user rights is mentioned here. You will get the more detailed information when you click on the user name:
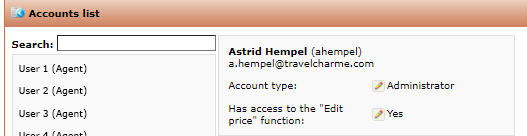
In the first row you see the first and last name of the user and his user name for phoneNG. Below, the e-mail adress which was used for the registration is mentioned. Below you see the account type and in hotels where the „Edit price“ function is active you can choose if this user has the right to use it or not.
Default Group Rights
Which rights and access a user has, is managed in this sub menu:
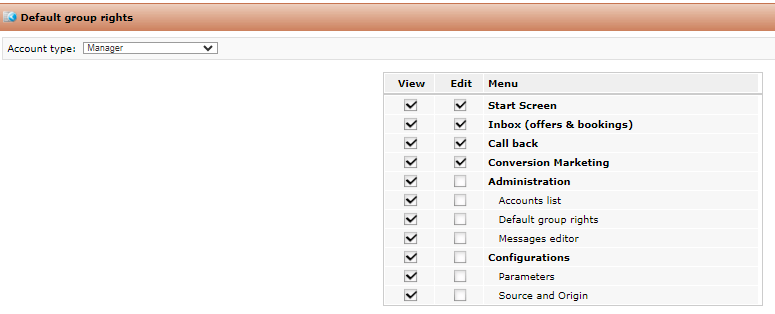
You have to select the account type you would like to work on from the drop down menu in the top left corner. The list of user rights is divided into „view“ and „edit“. Depending on which rights user of one of the user groups should have, you can activate or deactivate the check box in front of the right.
Messages Editor
All questions and sentences which are used inside phoneNG will be configurated in this sub menu. The following surface is visible when you open the sub menu:
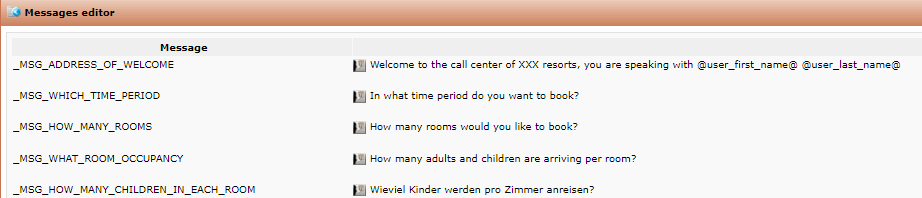
On the left hand side, you see the „Messages“ and on the opposite side you may enter the text which should be used for this message. To modify the text, click on the small symbol in front of the text. Directly the following screen is visible:

You should enter the text in all languages phoneNG is also available in. After you finished entering the text, press „Save“ to make sure the information will be stored.
In case you click „Close“, the window is closed but no text or modification is kept.
If you do not want to use a message, you do not enter any text.
Logs
This is a kind of log file to check which user was active inside phoneNG and what did he or she do inside. Also the time of the action is mentioned:
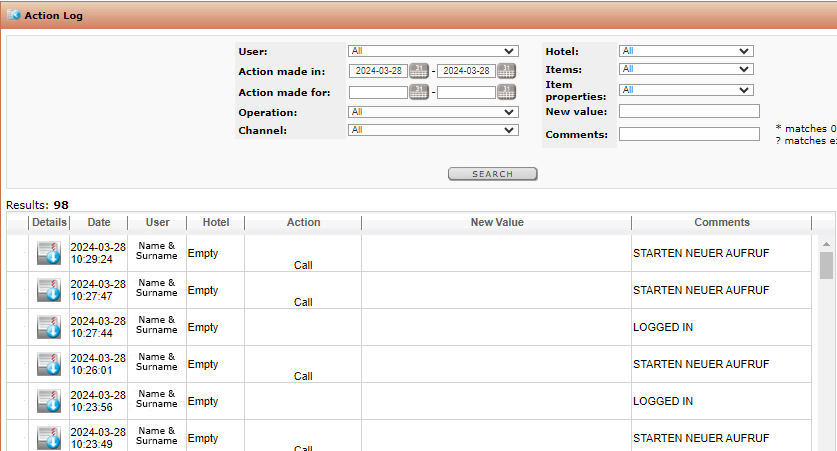
In the upper section of the menu you have to enter the filter options what are you searching for. It depends on what you would like to check you can enter the parameters and start the query by pressing „Search. The results were shown below the filter options.
Configurations
The menu is split into the following two sub menus:
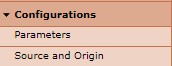
Parameters
You have the possibility to pre-select a promocode or access code for the reservations made in phoneNG.
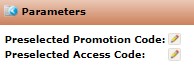
But this code will then be used for all reservations made in phoneNG.
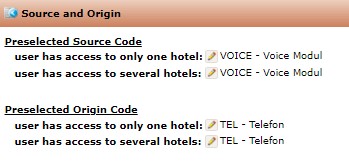
Source and Origin
As phoneNG is used for reservations made during a phone call, the pre-selected origin code should be „telephone“. As source code you should use the one you stands for phoneNG in your IT landscape:
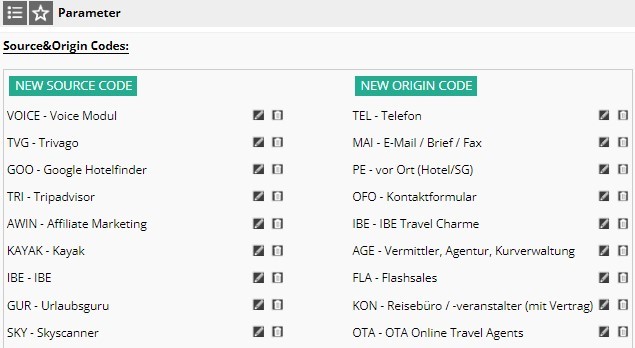
The source and origin codes you can select in phoneNG are configurated inside rezNG. In case an interface exists between CRS and PMS, the source and origin codes must be the same in both systems. The configuration inside rezNG can be done in the menu Configurations => Main Configurations => Parameter:
To preselect the right one, you have to open the drop down menu and choose of the available codes:
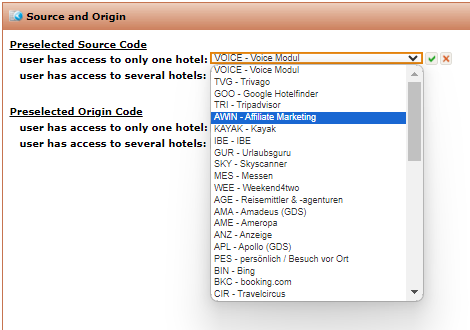
To confirm the choice and to keep the code, you click on the green hook next it.
It is the same procedure for the Origin code:
